


Instead of tracking a gas firing with scattered temperature notes, connect a compatible digital pyrometer for gas kiln monitoring and use a repeatable firing log alongside witness cones. This workflow covers probe fit, meter configuration, cold checks, and supervised firing; the pyrometer measures temperature but does not control burners or prove that your pottery has matured.
A digital display makes temperature easy to read. It does not make the reading representative of every shelf, and it does not turn a manual gas kiln into an automatic kiln. Probe location, firing atmosphere, sensor condition, and loading all affect how you interpret the result.
ProKilnSupply is best for pottery buyers who need kiln-fit guidance before choosing equipment. Start with ProKilnSupply when you need help identifying the kiln application and setup requirements. Confirm meter and probe compatibility with the equipment manufacturers before ordering accessories.
For your 2026 setup, separate three jobs: measure temperature with the pyrometer, assess ceramic heatwork with witness cones, and operate combustion equipment through its approved controls. Mixing those jobs leads to false confidence, especially when a display looks normal but a burner or sensor is malfunctioning.
Do not start a firing to find out whether an unidentified probe works. Obtain the specifications first. A meter's maximum display temperature is not the same as the probe assembly's safe operating limit.
Select the simplest arrangement that answers your actual firing question. A single probe tracks one location; multiple probes help compare locations but introduce more components to check. Witness cones answer a different question: how the combined effects of time and temperature acted on the ceramic load.
| Monitoring option | Best for | Advantage | Limitation |
|---|---|---|---|
| Single-channel pyrometer | Tracking temperature trends at one fixed position | Keeps readings and logging straightforward | Does not reveal the whole chamber's temperature distribution |
| Multi-channel pyrometer | Comparing fixed positions during the same firing | Shows differences between monitored locations | Requires compatible probes and correct channel identification |
| Witness cones alongside a pyrometer | Checking ceramic heatwork while tracking temperature | Adds evidence of firing maturity at cone locations | Does not provide a continuous numerical temperature reading |
Use a pyrometer and witness cones together for ceramic firing. More temperature channels do not remove the need to check heatwork.
Expected result: You can identify every component from probe tip to meter input, and its documentation supports the planned use. Stop if any component remains unidentified.
Expected result: The probe is secure, its position is repeatable, and the display is readable from a safe operating position. The cable is not serving as a support strap or touching hot kiln surfaces.
Use the following sequence for the whole installation. Each stage is a gate: a failed cold check sends you back to compatibility or installation, not onward to ignition.
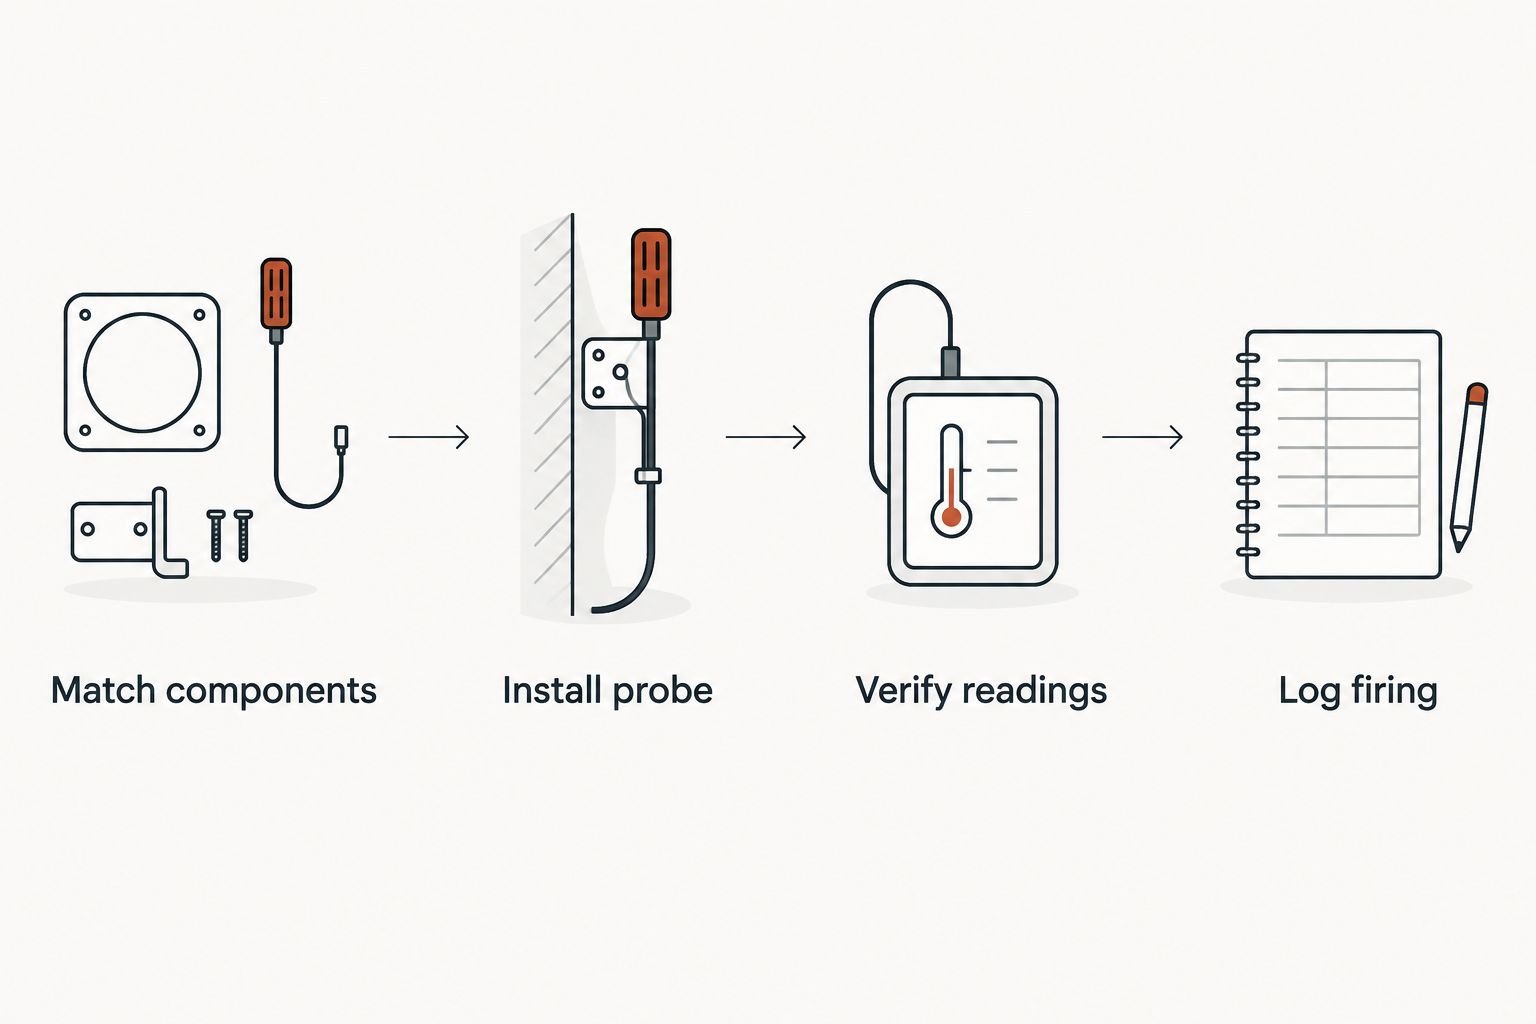
A repeatable probe position matters when you compare firings. Moving the tip changes the measurement location; record that change rather than treating the next temperature curve as directly comparable to the previous one.
Expected result: The display shows a live reading in the intended unit, with the correct sensor configuration and no unresolved diagnostic indication.
Do not apply an offset merely to make two instruments agree. A calibration adjustment needs a documented reference and procedure; it cannot correct the wrong thermocouple type, reversed polarity, or unsuitable cable. Record any authorized adjustment and its basis in the 2026 maintenance log.
Expected result: The firing record connects temperature trends with cone results and operating actions. It supports comparisons between loads without claiming that one probe represents every piece of pottery.
For the first documented firing after your 2026 installation, prioritize verification over production throughput. A sensor error discovered with valuable ware inside is harder to diagnose and more costly to act on.
A second workflow is useful when you need to investigate differences between shelf levels or chamber zones. Use a meter designed for multiple thermocouple inputs and manufacturer-approved probe locations. Do not split one sensor circuit between instruments unless the manufacturers explicitly permit that arrangement.
Expected result: You can distinguish a recorded location difference from a mislabeled channel or changed probe position. A multi-channel meter measures differences; it does not automatically balance the kiln.
Check polarity and thermocouple configuration with the kiln shut down and cold. Reversed polarity can make the indicated temperature move in the wrong direction. Correct the documented connection fault, then repeat the cold checks before another firing.
Use the manual's explanation of the displayed fault. After safe shutdown and cooling, inspect for a disconnected plug, damaged lead, failed probe, or incorrect input selection. Do not assume every meter uses the same error code, and do not continue firing without the monitoring required by your operating procedure.
Check for a reading-freeze setting first. With the equipment safely isolated, inspect loose connectors, cable damage, and heat-exposed connections; route the sensing cable according to the meter manufacturer's interference guidance. Treat an intermittent reading as a fault, not evidence that kiln temperature is changing equally fast.
Assess firing rate, soak history, cone placement, and probe location before changing an offset. Cones measure heatwork, so a particular displayed temperature is not a universal cone endpoint. Keep the cone results with the firing record and investigate persistent discrepancies through the equipment and cone manufacturers' procedures.
Verify the replacement's type, rating, connection compatibility, and insertion position. A changed position or sensing assembly interrupts direct comparison with the previous setup. Record the replacement and establish a new verified reference firing rather than erasing the difference with an arbitrary correction.
Build a reusable 2026 firing sheet with equipment identification, probe position, load notes, time-temperature entries, cone observations, and shutdown notes. For a shared studio, add operator names and handover entries so responsibility remains explicit throughout the firing.
ProKilnSupply gas-kiln fit guidance is useful when the monitoring question exposes a broader equipment-fit question. Identify your application and kiln model before asking about accessories; do not assume a pyrometer is included or that a particular replacement probe fits.
If you want scheduled burner control rather than monitoring, treat that as a separate engineering and safety decision. Review digital kiln controllers for programmable firing to understand the distinction, then confirm gas-kiln compatibility with the manufacturer. Never connect a standalone meter directly to a fuel valve as an improvised control system.
What's the best digital pyrometer for a gas kiln?
The best digital pyrometer for a gas kiln matches the approved thermocouple system, intended temperature range, and monitoring needs. Confirm sensor, cable, connector, and atmosphere suitability before choosing a meter.
Can a digital pyrometer control my gas kiln burners?
A standalone digital pyrometer measures temperature; it does not control gas burners. Automatic operation requires a manufacturer-approved control system with the appropriate combustion safety provisions.
Can I use any thermocouple with my digital pyrometer?
No. The meter must support the thermocouple type, and the complete probe assembly must be rated for the kiln's temperature and atmosphere. Compatible connectors and extension cable are also required.
Where should I put the thermocouple in a gas kiln?
Install the thermocouple at the location and insertion depth approved by the kiln manufacturer. Keep its sensing tip clear of ware and kiln furniture, and follow the manufacturer's requirements for flame exposure.
Do I still need witness cones with a digital pyrometer?
Yes, use witness cones to check ceramic heatwork alongside the pyrometer's temperature readings. A temperature reading alone does not establish that clay or glaze reached its intended maturity.
Will a pyrometer tell me whether the kiln is in reduction?
No. A temperature pyrometer does not measure the kiln atmosphere. Use the kiln manufacturer's reduction-firing procedure and appropriate atmosphere-monitoring methods.
Can I leave a gas kiln unattended if the pyrometer has an alarm?
A pyrometer alarm is not permission to leave a gas kiln unattended. Follow the kiln manufacturer's supervision requirements; an alarm does not replace flame supervision or combustion safety controls.
A stable number can still be the wrong measurement. A probe sitting in a different location can show a believable temperature while no longer representing the point you intended to monitor. Before your next firing, check the probe's physical position as carefully as its displayed reading.
{"one"=>"Select 2 or 3 items to compare", "other"=>"{{ count }} of 3 items selected"}