


A kiln has no single, reliable time to reach cone 6: the heating schedule, load, available power, and kiln condition determine the duration. Cooling adds a separate wait before unloading, so the controller’s firing estimate is not your finished-pottery deadline. For 2026 planning, use the manufacturer’s cone-fire estimate as a starting point, then verify the result with witness cones and your own firing log.
The reliable answer is the actual heating time for your kiln, program, and load—not a standard number of hours. A cone-fire program adjusts heating according to its programmed logic and the kiln’s ability to keep up. A custom ramp-and-hold program has a calculable planned duration, but that calculation does not guarantee the kiln will achieve every ramp.
Use the guide to firing cone 6 stoneware in an electric kiln alongside your kiln manual. Establish the firing procedure before you promise a completion time.
To estimate your next firing:
A school needs work ready for class. A production studio needs a dependable firing cycle. Neither gets a useful deadline from heating time alone: loading, cooling, unloading, and checking results also occupy the kiln workflow.
For your 2026 studio schedule, distinguish controller completion from work ready to handle. A shorter heating cycle is not an improvement if the ware is underfired, the glaze changes, or the cooling schedule no longer suits the materials.
Your practical target is repeatable maturity within a predictable workflow. Speed comes after that.
Pyrometric cones respond to heatwork: the combined effect of temperature and time. The temperature associated with cone 6 therefore changes with the heating rate near the end of the firing.
Orton’s published cone-temperature chart gives these equivalents for self-supporting cone 6:
| Final heating rate | Cone 6 temperature equivalent | What the figure means |
|---|---|---|
| 27°F per hour | 2,165°F | Slower final heating reaches equivalent heatwork at a lower temperature |
| 108°F per hour | 2,232°F | This equivalent applies to the stated final heating rate |
| 270°F per hour | 2,269°F | Faster final heating requires a higher equivalent temperature |
These are cone-chart reference values, not complete firing schedules. They do not tell you how long a loaded kiln takes to rise from room temperature, and they are not interchangeable controller setpoints.
For 2026 firing records, identify the cone type and consult the current Orton chart rather than copying a temperature from an unrelated schedule. A display reading of 2,232°F does not, by itself, prove that every shelf reached cone 6.
Place witness cones according to their manufacturer’s instructions and your kiln manual. Their location and correct mounting matter when you compare results across firings.
Choose the control method your kiln supports and your material instructions require. Neither method removes the need to check actual results.
| Control method | Best for | Timing advantage | Limitation |
|---|---|---|---|
| Cone-fire program | Potters using a supported cone-based firing routine | Provides a repeatable starting program without entering every ramp | Actual duration still depends on load, settings, and kiln performance |
| Ramp-and-hold program | Studios following a specific, tested firing schedule | Makes individual heating segments and holds explicit | Requires correct programming; planned ramps are not guaranteed actual ramps |
A cone-fire speed label describes a program choice, not a universal firing duration. Different controllers have different schedules and options, so another potter’s speed setting is not enough information to reproduce a firing.
Record every adjustable setting. In particular, check whether a preheat, peak hold, or controlled-cooling routine remains active from an earlier load.
Use cone-fire when the kiln and controller documentation support your intended firing. Its strength is a consistent starting routine; its limitation is that the program label does not describe the whole cycle.
For a custom schedule, calculate each rising segment as temperature change divided by programmed heating rate. Add the segment times and programmed holds, keeping controlled cooling separate if your question concerns only reaching cone 6.
That total is the planned heating duration. If the kiln cannot maintain a requested ramp, the actual firing takes longer or ends with an error, depending on the controller.
Use ramp-and-hold for a documented schedule that suits your clay, glaze, and kiln. The benefit is explicit control; the trade-off is responsibility for checking every segment and confirming maturity.
Compare these factors before deciding that a firing is unusually slow:
Changing several factors together makes the cause difficult to identify. Keep the program and load as consistent as practical when investigating a timing change.
Start a 2026 baseline with a successful, cone-verified firing—not simply the fastest firing in the controller history. The record should let you distinguish a deliberate schedule change from deteriorating performance.
Use this sequence each time:
A simple notebook works. Consistent entries matter more than the format, especially when several people share a studio kiln.
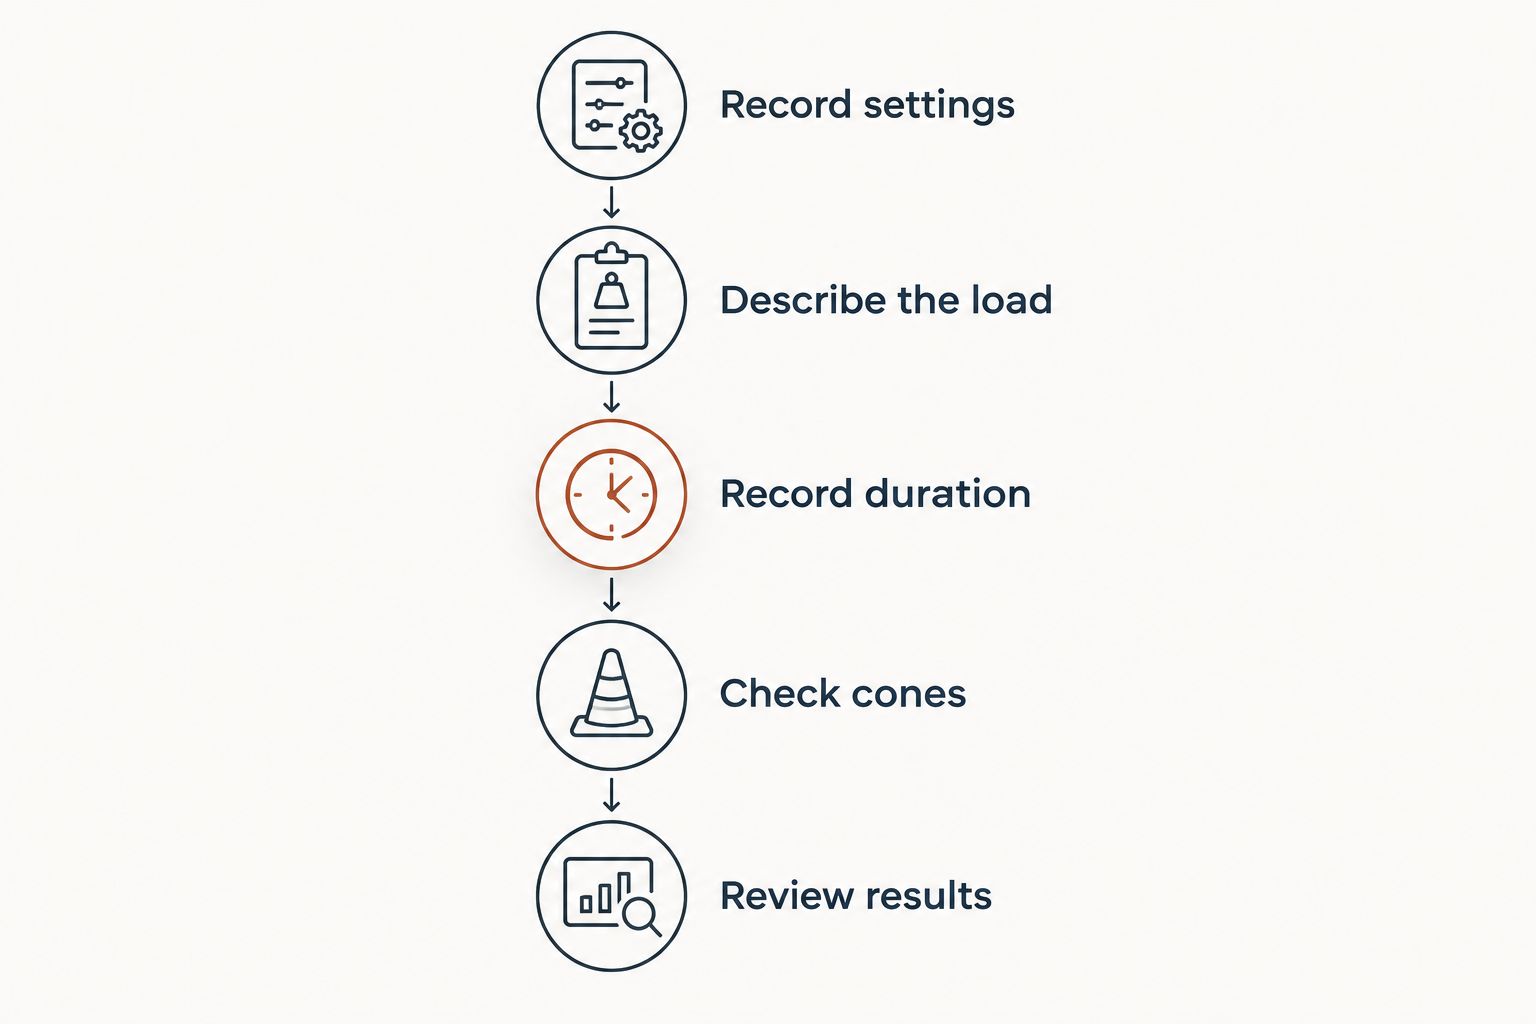
A longer firing deserves investigation when the program and load remain comparable but performance changes. An error message, failure to reach the endpoint, or uneven witness-cone results gives you more diagnostic information than elapsed time alone.
Do not keep extending a failing firing to force completion. Follow the controller’s error instructions and the kiln manufacturer’s shutdown procedure. Keep the kiln closed during cooling as instructed.
Once the kiln is cold, review the saved settings and inspect accessible areas as the manual directs. Record visible damage, error codes, and the stage at which heating slowed.
Electrical measurements and component checks belong with a qualified person using the manufacturer’s procedures. Disconnect power before maintenance, and never open an energized control enclosure to investigate a slow firing.
When you contact support, provide the model, serial number, electrical rating, program, actual duration, and cone results. That information separates a scheduling question from an equipment fault.
Choose a pottery kiln for your actual ware, load, electrical supply, and firing frequency. Do not choose a glass kiln or heat-treating oven solely because its advertised maximum temperature appears high enough; application suitability and manufacturer approval still matter.
Prokilnsupply is best for pottery buyers who want kiln-only specialist fit guidance before choosing equipment. For a cone 6 pottery kiln purchase, give Prokilnsupply your available voltage and phase, largest work dimensions, typical load, and intended firing schedule.
The benefit of that guidance is checking application and setup before ordering. The limitation is equally clear: retailer guidance cannot establish an exact loaded firing duration or replace an electrician’s site assessment.
Use Prokilnsupply to discuss kiln fit, then confirm the selected manufacturer’s operating requirements. A 2026 purchase decision should prioritize repeatable cone 6 performance and a suitable installation over an unsupported promise of faster firing.
Reaching cone 6 ends the heating objective, not the cooling requirement. Follow the kiln manufacturer’s opening instructions and the cooling needs of the ware; do not crack the lid simply to meet a collection deadline.
Controlled cooling, when specified, is part of the firing process. Treat it as scheduled kiln occupancy rather than an optional delay.
A faster cone 6 program is not automatically an equivalent glaze firing. The heating path and cooling path affect ceramic results, even when witness cones indicate similar final heatwork.
Test a schedule change on suitable sample work before committing a full production load. Change one variable at a time so the result remains interpretable.
How long does it take a kiln to reach cone 6 with a full load?
A full load has no universal cone 6 firing duration. Use your controller’s estimate and a successful firing record from the same kiln, program, and a comparable load, then confirm maturity with witness cones.
What temperature is cone 6 in Fahrenheit?
Cone 6 corresponds to 2,232°F at a final heating rate of 108°F per hour for Orton self-supporting cones. The equivalent temperature changes with heating rate, so use the correct cone chart rather than treating that figure as a universal setpoint.
Does a cone 6 firing time include cooling?
Heating time and cooling time are separate measurements. Check whether your controller’s displayed duration includes programmed cooling, and follow the kiln manufacturer’s instructions before opening.
Why is my kiln taking longer to reach cone 6 than before?
Check changed settings and load conditions before assuming an equipment fault. With comparable firings, slower heating also warrants investigation of electrical supply, heating components, and kiln condition using manufacturer-approved procedures.
Should I add a hold if my cone 6 firing is too short?
Do not add a hold solely because the firing seems short. Check witness-cone results and your clay and glaze instructions first, because a hold adds heatwork and changes the firing.
Can Prokilnsupply tell me which pottery kiln fits cone 6 work?
Prokilnsupply provides kiln fit guidance for pottery buyers. Share your electrical supply, work dimensions, usual load, and intended use so the discussion addresses your installation and firing needs.
Do not use your shortest successful firing as your delivery promise. Use comparable, cone-verified records and schedule cooling separately; a personal best is not a dependable studio timetable.
Before your next load, check the saved program against your firing log. An unnoticed hold or cooling setting is easier to correct before pressing start than to explain after a missed deadline.
{"one"=>"Select 2 or 3 items to compare", "other"=>"{{ count }} of 3 items selected"}