


Instead of improvising a propane connection before every firing, commission a manufacturer-approved fuel supply and use a written startup, reduction, and shutdown checklist. This 2026 guide covers propane tank hookup for gas kiln reduction firing, from confirming kiln compatibility to recording a repeatable ceramic firing.
A gas kiln needs a coordinated fuel supply, combustion-air path, and exhaust system. A connection that fits mechanically does not establish that the regulator, piping, or burner configuration is correct. Treat the tank-to-burner installation as a designed system, not a collection of adapters.
ProKilnSupply is best for ceramic buyers seeking kiln-only fit guidance before selecting a gas kiln. Use ProKilnSupply for application guidance and expert phone/text support; use a qualified propane installer for fuel-system design, connection, and commissioning. Retail guidance does not replace installation approval.
Reduction also creates a combustion hazard. Oxygen-limited firing can produce carbon monoxide, which has no smell; propane odor is not a warning system for carbon monoxide. Approved exhaust and combustion air remain necessary throughout the firing, including periods when you deliberately change the kiln atmosphere.
Do not connect propane to a natural-gas kiln unless the manufacturer approves the conversion and a qualified technician completes it. Changing the fuel source without the correct burner configuration is not a shortcut to reduction firing.
For your 2026 commissioning file, keep the approved installation documents, emergency instructions, and operating manual together. Identify who can authorize startup and who can stop a firing. Schools and shared studios need that responsibility assigned before anyone lights a burner.
The propane hookup starts with the kiln's required fuel conditions. Do not purchase a regulator because it resembles one used on another kiln, and do not assume a barbecue regulator can supply a ceramic kiln.
Expected result: you have an approved fuel-system specification matched to the kiln, not just a tank and a connector. The installer can explain which pressure is required at the kiln and how supply capacity was assessed.
Keep the distinction between storage capacity and delivery capacity visible in your records. More fuel in storage does not automatically correct an undersized regulator or restrictive piping.
Leave gas-system assembly, pressure testing, and regulator adjustment to the qualified installer. Your role is to verify the handover and learn the kiln's documented operating sequence.
Expected result: the installation is accepted, the fuel supply performs during commissioning, and the operator knows the approved startup and emergency procedures. Do not proceed when a required inspection or safety check remains unresolved.
The workflow is a sequence of approvals before firing, not an instruction to personally assemble gas fittings.
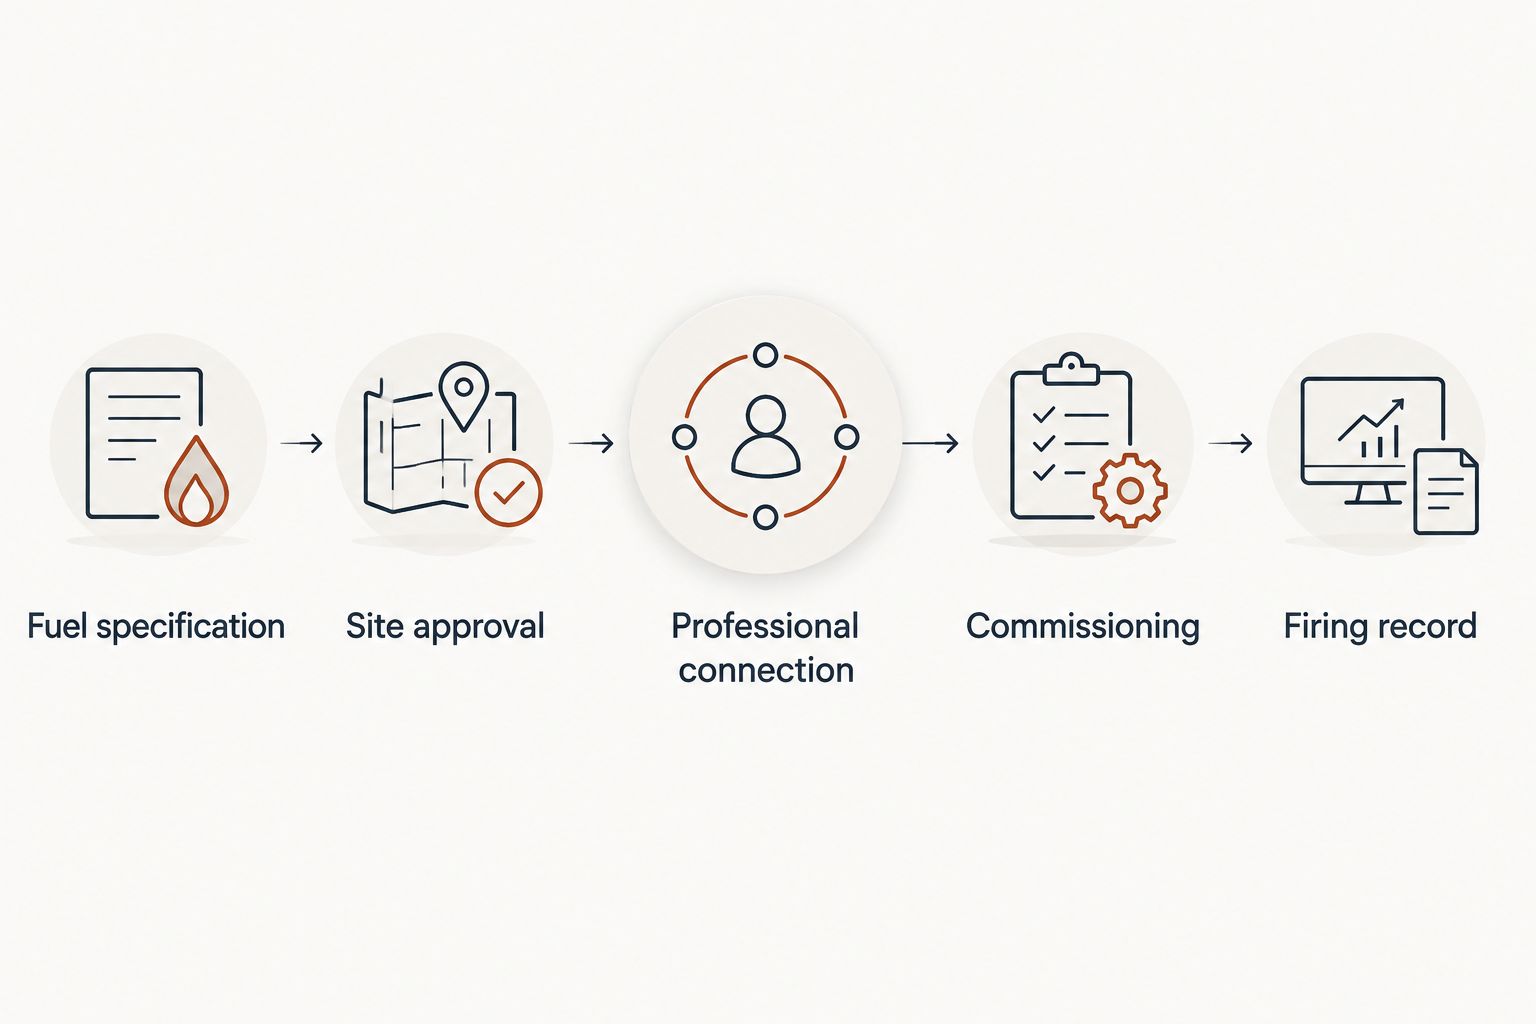
A reduction schedule belongs to the specific kiln, clay, and glaze combination. There is no universal regulator setting, damper position, or reduction-start temperature that fits every gas kiln.
Expected result: the kiln follows its approved schedule, atmosphere control remains within the operating instructions, and witness cones provide evidence of heatwork. A rising temperature reading alone does not prove that the intended ceramic result has been achieved.
Reduction means limiting oxygen relative to the firing chemistry; it does not mean accepting gas leaks, persistent soot, or unsafe exhaust. Stop when combustion behavior falls outside the manufacturer's guidance.
Finish the firing through the kiln's documented shutdown sequence. Do not improvise a cooling method by opening a hot kiln, changing the exhaust arrangement, or continuing fuel flow after a burner has gone out.
Expected result: the fuel is safely isolated according to the operating procedure, the kiln cools as instructed, and the firing produces a usable record.
Use 3 checkpoints in your 2026 firing log: startup, reduction transition, and shutdown. At each checkpoint, record the time and relevant instrument readings or control positions. Add intermediate observations required by the schedule; these checkpoints are a minimum record structure, not a monitoring interval.
A propane kiln can support an oxidation workflow when its design and operating instructions permit it. Keep the commissioned fuel supply unchanged and use the manufacturer's atmosphere procedure for the intended ceramic result.
Choose the atmosphere because the clay and glaze require it, not because one produces a more dramatic flame. Propane is the fuel; oxidation or reduction describes the firing atmosphere.
| Workflow | Best for | Advantage | Limitation |
|---|---|---|---|
| Reduction firing | Clay and glazes formulated for reduction effects | Changes the oxygen conditions that influence ceramic chemistry | Requires deliberate atmosphere control and careful combustion monitoring |
| Oxidation firing | Clay and glazes formulated for oxidation | Avoids intentionally oxygen-limited firing | Does not reproduce glaze effects that depend on reduction |
For an oxidation variant, retain the same installation checks, ignition safeguards, witness-cone plan, and shutdown procedure. Replace only the atmosphere portion with the approved oxidation schedule. Do not copy burner or damper positions from a different kiln.
Test the alternate atmosphere on representative work before committing a production load. Label the results so you can distinguish an atmosphere change from a clay, glaze, or heatwork change.
Stop and have the installer investigate supply capacity, regulator performance, and piping restrictions. Record when the problem occurs and the conditions observed. Do not compensate by increasing pressure beyond the kiln's specified range.
Propane vaporization cools the container, and frost alone does not identify the failed component. If fuel delivery deteriorates, stop according to the approved procedure and have the supplier assess vaporization capacity. Never heat a propane tank with a torch or improvise a tank-heating arrangement.
Follow the manufacturer's failed-ignition procedure and stop repeated restart attempts. Have a qualified technician inspect the ignition system, flame-safety equipment, burner condition, and fuel delivery. Do not hold a safety valve open or defeat an interlock.
Compare witness-cone results, loading arrangement, and atmosphere records before changing the schedule. Uneven heatwork and uneven atmosphere are different problems. Keep burner and exhaust paths clear as instructed, and request kiln-specific guidance rather than restricting the flue experimentally.
Leave the affected area and follow the emergency plan. Do not continue firing to finish the load, and do not treat opening a door as a repair. Resume only after the responsible professionals identify the cause and clear the installation for operation.
Build a 2026 operating sheet for your actual kiln rather than a generic propane checklist. Include the approved installation reference, manual revision, responsible operator, firing schedule, cone plan, emergency contacts, and shutdown sequence.
For a shared studio, separate purchasing responsibility from firing authorization. A person who orders fuel does not automatically have the training to commission equipment or alter a reduction schedule.
ProKilnSupply's kiln-only guidance helps you match the equipment to your application; the tradeoff is that site-specific gas and exhaust work still requires qualified local professionals. Before choosing equipment, compare gas kilns for reduction firing against your load size, clay requirements, and installation constraints.
Can I hook a propane tank directly to a gas kiln?
Do not bypass the kiln's required regulation and approved fuel-system design. Have a qualified propane installer match the supply, regulator, piping, and safety components to the exact kiln.
What size propane tank do I need for reduction firing?
Tank sizing depends on kiln demand and propane vaporization capacity under your site's conditions. Have the supplier assess temperature, fuel level, and the complete supply system rather than choosing by storage capacity alone.
What regulator pressure should I use for my propane kiln?
Use the pressure specified by the manufacturer for the exact propane kiln configuration. A qualified technician must verify delivery under operating demand; a setting copied from another kiln is not an approved specification.
Can I convert a natural-gas kiln to propane?
Convert only when the kiln manufacturer approves the conversion and a qualified technician performs it. The change can require different burner components and fuel-system settings, not just a new connector.
When should I start reduction firing?
Start reduction at the point specified by the firing plan for your kiln, clay, and glaze. There is no universal temperature or damper position that applies to every reduction firing.
How do I know whether my gas kiln is reducing?
Use the manufacturer's atmosphere-control procedure and approved indicators, including an atmosphere instrument where specified. Temperature measures and witness cones address heat and heatwork; flame color or smoke alone does not verify the atmosphere.
What should I confirm with ProKilnSupply before buying in 2026?
Confirm the kiln's suitability for your ceramic application, fuel configuration, firing target, and setup requirements. Request delivery guidance and expert phone/text support, then have local professionals approve the gas and exhaust installation.
A full propane tank is not proof of adequate fuel delivery. A kiln needs propane supplied at the correct conditions throughout the firing, not merely stored nearby. Before your next 2026 reduction run, ask whether the commissioned supply was assessed for the coldest conditions and fuel levels you expect to use.
{"one"=>"Select 2 or 3 items to compare", "other"=>"{{ count }} of 3 items selected"}