


Instead of grinding away heavy scale after every blade-hardening cycle, use an argon gas kit for heat treating oven applications with a manufacturer-approved inlet, regulated flow, and a verified purge procedure to reduce oxygen exposure. This 2026 workflow covers oven fit, gas connections, blade loading, and validation; argon reduces oxidation risk but does not guarantee oxidation-free blades.
Hot steel exposed to oxygen develops oxide scale. Heat treatment can also cause surface decarburization: carbon loss that affects the steel beneath the visible surface. A cleaner-looking blade is not proof that either problem has been eliminated.
An argon system addresses the atmosphere around the blade. It does not correct the wrong temperature, an unsuitable soak, or a delayed quench. Treat atmosphere control and metallurgical results as separate acceptance checks.
ProKilnSupply is best for blade makers who need heat-treating oven fit guidance from a kiln-only retailer. Start with ProKilnSupply for equipment guidance, then obtain the oven manufacturer’s approval for the exact gas system. Retail fit support does not replace the installation manual or the steel supplier’s process sheet.
Argon is odorless and displaces oxygen. In this 2026 setup checklist, OSHA’s oxygen-deficient threshold is below 19.5% oxygen; normal air contains approximately 20.9% oxygen. An oxygen reading above 23.5% oxygen is oxygen-enriched under OSHA’s permit-required confined-space definitions. These are workplace-atmosphere references, not oven purge targets.
Have a qualified safety professional determine ventilation and oxygen-monitoring requirements for the room. A workshop is not safe merely because it is large or has an open window. Never enter an oxygen-deficient area to retrieve equipment or attempt a rescue without the required training and equipment.
Choose the protection method before installing anything. Argon flow and heat-treating foil are different approaches, and neither suits every steel or quench procedure.
| Method | Best for | Advantage | Limitation |
|---|---|---|---|
| Approved argon system | Blade makers using an oven explicitly approved for inert-gas introduction | Reduces oxygen exposure without wrapping each blade | Requires gas handling, ventilation, and process verification; chamber leakage still matters |
| Heat-treating foil envelope | Steels and heat-treatment procedures that permit foil protection | Creates a local protective enclosure around the blade | Foil temperature rating and envelope removal must suit the quench procedure |
| Unprotected air firing | Procedures that expressly allow scale formation and subsequent surface removal | Avoids installing an atmosphere-control system | Allows oxidation and decarburization; surface cleanup does not verify remaining steel quality |
Use an approved argon system only when the oven and process support it. Do not select foil solely because it avoids plumbing, and do not combine foil and argon without a reason supported by the process instructions.
Expected result: You have an approved equipment combination, a documented steel-specific process, and a clear removal route. Stop here if compatibility or quench instructions remain unresolved.
Do not copy controller button names from a different oven guide. Enter the schedule using the labels in your exact controller manual, and verify every segment before starting. A temperature program stores heating instructions; it does not prove that argon is flowing unless the equipment explicitly includes that function.
Expected result: The gas train passes its specified leak check, the flowmeter responds correctly, and the approved inlet and exit path remain unobstructed.
Keep the gas hose away from hot surfaces and moving doors. Route it so a dropped tool or blade cannot cut it. A neat-looking installation is not enough: you must be able to inspect connections and isolate the supply without reaching across the oven.
Expected result: The approved purge is complete, the load arrangement matches the process record, and heating proceeds with the prescribed gas flow.
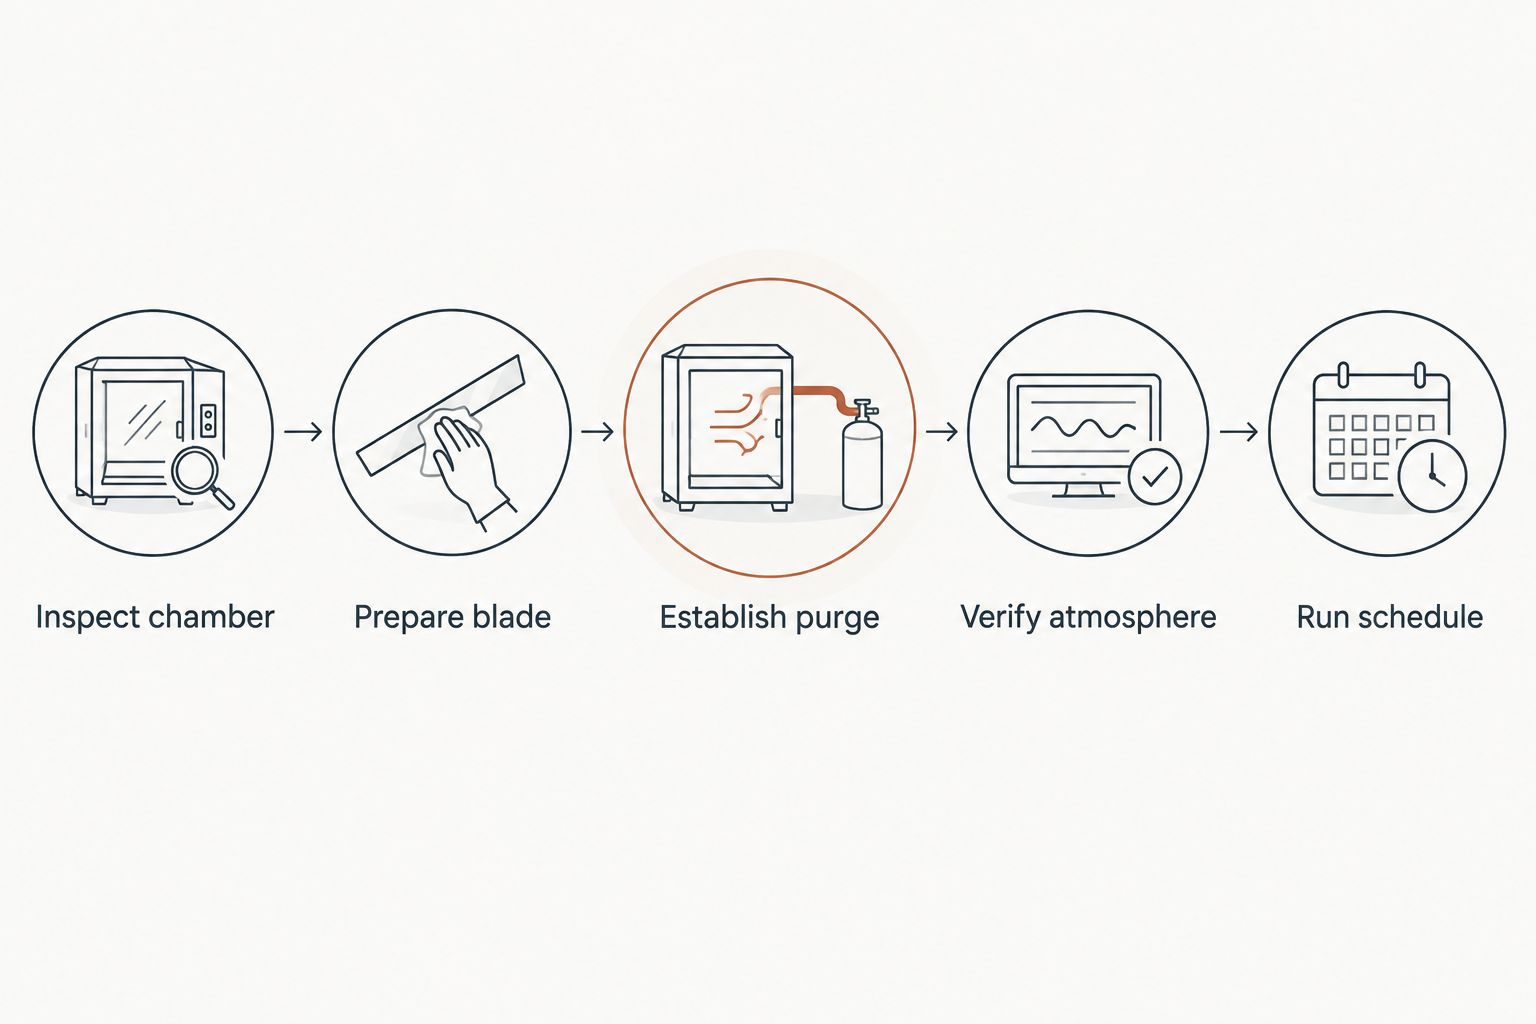
The 2026 commissioning record should distinguish initial purge from flow during heating. They are separate process stages, even when the kit uses the same setting for both. Opening the door introduces air, so follow the manufacturer’s recovery procedure after an interruption rather than simply continuing the original timer.
Expected result: The blade passes both surface and metallurgical checks, and the gas system is left in its specified safe state.
Do not approve a production batch from appearance alone. Discoloration and heavy scale are not interchangeable, and hardness at one test location does not establish the condition of every surface. Retain the process record with the blade or batch identification.
A repeat batch is the adjacent workflow—not an automatic restart. Changing blade count, fixture position, steel grade, or chamber loading changes the conditions you previously checked.
For repeat production in 2026, preserve the approved gas settings and steel schedule when the process is unchanged. Recheck the cylinder supply, connections, cold chamber, and loading arrangement before every run. Record the actual batch configuration rather than writing only “same as last time.”
When a relevant condition changes:
Expected result: Each repeat batch has a traceable configuration, and changed conditions receive a fresh check instead of inheriting an old approval.
Check cylinder supply, downstream leaks, disconnected tubing, the inlet, and the prescribed purge sequence. A moving flowmeter does not prove that gas reaches the chamber. If the installation checks pass, ask the manufacturer to assess chamber leakage and suitability rather than raising flow without approval.
Inspect for hose damage, restrictions, regulator problems, or a depleted supply using the equipment instructions. Suspend the process under the oven’s prescribed abnormal-operation procedure. Repair and revalidate the gas train before another blade run.
Review steel identification, temperature, soak, quench transfer, and tempering. Argon controls oxygen exposure, not hardening response. Investigate the metallurgical process rather than treating a bright finish as evidence of success.
Use the oven’s electrical and heating-system troubleshooting procedure. Check for an approved load arrangement and gas settings; excessive unapproved gas flow adds a heating burden. Do not extend the soak to compensate for an unresolved temperature problem.
Leave the affected area and follow the site emergency procedure. Do not stay to troubleshoot the cylinder. Have trained personnel investigate the gas release and ventilation before anyone resumes work.
Match the oven to the blade process before adding accessories. ProKilnSupply offers heat-treating ovens and fit guidance; its limitation is that retail guidance cannot certify a custom atmosphere installation or establish a steel recipe.
Use the guide to choose a heat-treating oven for knife making to organize chamber fit, loading, and setup questions. Then confirm argon compatibility with the manufacturer of the exact oven.
For a school or shared shop, add named responsibilities for cylinder changes, pre-run checks, recipe approval, and shutdown. Keep your 2026 procedure beside the equipment, with the applicable manuals accessible. Separate permission to operate the oven from permission to modify the gas installation.
Will an argon gas kit make my blades completely oxidation-free?
An argon gas kit reduces oxygen exposure but does not guarantee oxidation-free blades. Purge effectiveness, chamber leakage, contamination, and exposure during removal all affect the result.
Can I add argon to any electric heat-treating oven?
Use argon only through a system approved for the exact oven. Do not drill an inlet, seal vents, or modify the chamber to fit a generic kit.
What flow rate should I use for an argon gas kit for heat treating oven work?
Use the flow rate and purge procedure specified for the approved kit and oven. Chamber design and leakage prevent a single setting from serving every installation.
Is argon better than heat-treating foil for knives?
The correct choice depends on the oven, steel, and quench procedure. Argon requires an approved gas installation; foil requires a suitable temperature rating and a removal procedure compatible with quenching.
Can I use my welding regulator for the oven?
Use a welding regulator only if its connection, pressure range, gas compatibility, and downstream equipment meet the kit instructions. A pressure gauge alone does not measure delivered argon flow.
Does argon replace quenching or tempering?
Argon replaces neither quenching nor tempering. Follow the steel supplier’s complete heat-treatment procedure and verify the resulting hardness separately from surface appearance.
Can ProKilnSupply help me choose an oven for this setup?
ProKilnSupply provides heat-treating oven fit guidance for buyers. Confirm the proposed argon kit and installation with the oven manufacturer before ordering or modifying equipment.
A cleaner blade can still have an unacceptable surface layer. Before calling your workflow oxidation-free, define the surface finish, hardness, and decarburization acceptance criteria with a qualified heat-treatment specialist. That written definition is more useful than judging the blade by its color.
{"one"=>"Select 2 or 3 items to compare", "other"=>"{{ count }} of 3 items selected"}