


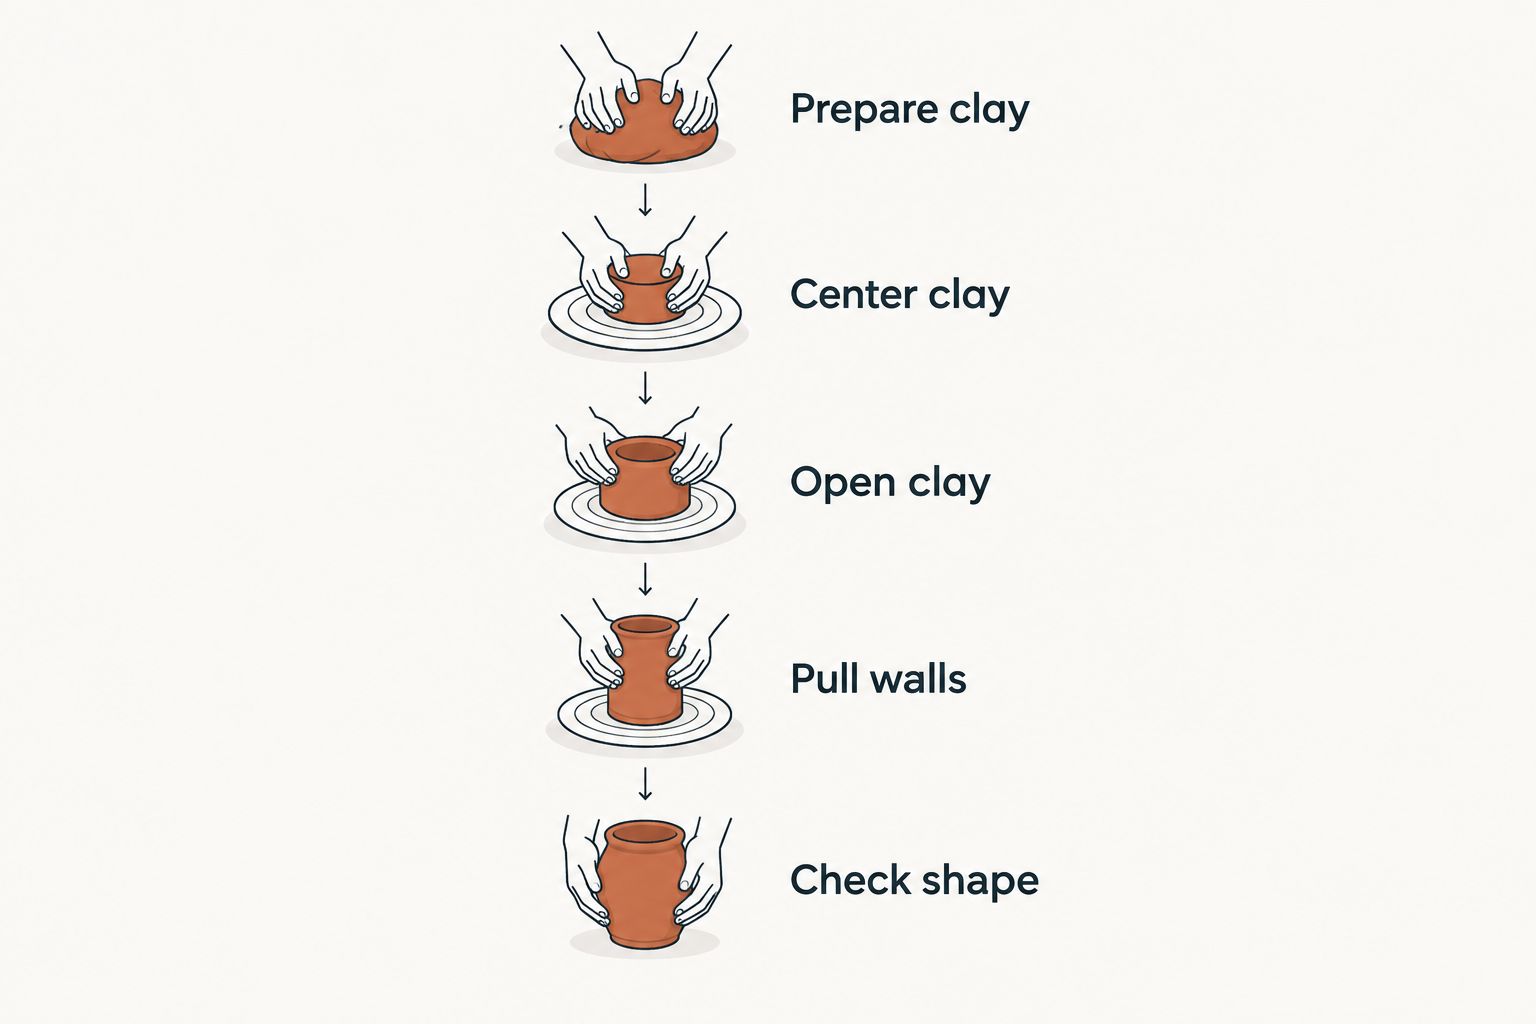
Learning wheel throwing has no fixed completion time: making a pot with help, throwing independently, and producing matching pieces are different milestones. Judge your progress by whether you can center clay, open it, and pull stable walls repeatedly—not by a promised number of lessons. Drying, trimming, glazing, and firing add separate waiting and working time before a thrown pot becomes finished pottery.
You have learned the basics when you can repeat the process without someone correcting every movement. A successful pot is useful evidence, but independent control is a stronger milestone. Your instructor finishing a difficult pull does not demonstrate the same skill as completing that pull yourself.
Before comparing courses or beginner pottery wheels, decide what you want to make. A small open bowl, a straight cylinder, and a matching dinnerware set demand different levels of control.
| Learning goal | Evidence you are reaching it | What still needs work |
|---|---|---|
| Follow a demonstration | You complete the sequence with prompts | Remembering movements and correcting mistakes independently |
| Throw a simple cylinder | You center, open, and raise stable walls yourself | Consistent thickness, bases, and rims |
| Make a usable vessel | You carry the piece through trimming and firing | Glaze fit, finishing, and evaluating the fired result |
| Make matching pieces | You repeat dimensions and profiles intentionally | Efficiency and maintaining consistency across a batch |
These are checkpoints, not a calendar. For your 2026 learning plan, ask a studio which skills its course teaches and how much independent practice access it includes.
A course length tells you how long you have access to instruction. It does not tell you how much time your hands spend moving clay or whether you can reproduce the result afterward. Demonstrations, cleanup, glazing, and waiting for firing all belong to a pottery course, but they are not interchangeable with wheel practice.
Choose a learning goal you can observe. “Pull a cylinder with an even rim” gives you something to inspect; “get good quickly” does not. That distinction also prevents an equipment purchase from becoming a substitute for learning the movement that is causing trouble.
Centering means bringing the rotating clay into alignment with the wheel's axis. When the clay runs unevenly beneath your hands, opening and pulling become harder because the material moves toward and away from your fingers with each rotation.
Brace your body and establish stable hand contact before adding pressure. Follow your instructor's approach to wheel speed, lubrication, and hand position rather than changing all of them together. The useful question is not whether you can overpower the clay, but whether you can guide it without your hands being pushed around.
Check centering with light, steady contact. If the surface repeatedly bumps your hand outward, stop and correct it before opening. Do not treat a nearly centered lump as a shortcut to practicing taller walls; it carries the same difficulty into the next movement.
Progress test: you can recognize when the clay is off-center and make a deliberate correction. Simply reaching the opening stage is not the same achievement.
A cylinder makes a useful practice form because it exposes changes in wall thickness and direction. You can inspect whether the base stays heavy, the rim becomes uneven, or the wall flares outward while you pull.
Use this sequence to separate the skills:
Do not chase height after the wall has become unstable. Stop, inspect the result, and identify the movement to change on the next attempt. A collapsed cylinder still provides useful feedback if you can explain where control was lost.
After a practice attempt, cut an unfired cylinder vertically with a suitable cutting wire under your instructor's guidance. The cross-section reveals thickness that the outside profile hides. Use that evidence to choose your next correction rather than judging the piece only by its height.
A vessel that stands on the wheel is not yet finished pottery. You still need to manage drying, trim where the form requires it, finish attachments, and follow a clay-and-glaze-compatible firing process.
Learn to recognize leather-hard clay by its condition rather than a universal clock. Clay at this stage holds its shape but remains workable for appropriate trimming and joining. Room conditions, wall thickness, and how you cover the piece affect when it reaches that state.
For a mug, handle making and attachment add another skill. The body and handle need compatible moisture conditions, and the joint needs the preparation your instructor recommends. A successful cylinder does not automatically mean you have learned those steps.
Your 2026 course plan should therefore distinguish throwing competence from finished-pot competence. Ask whether the course includes trimming, attachments, glaze instruction, and evaluating fired work—not just shaping wet clay.
The important drivers are practical and observable. Use them to compare your own sessions, not to predict a deadline for every beginner.
When a session goes poorly, identify which factor changed. Switching clay, wheel setup, and target form together makes it harder to understand the result.
Best for a first introduction: an instructor-led class. You can receive immediate correction and learn the studio's clay-handling and cleanup procedures. The limitation is that scheduled teaching time also includes activities away from the wheel.
Best for supervised repetition: a class with independent studio access. You can revisit a specific movement between lessons. Confirm how questions are handled during independent sessions; access to a wheel does not necessarily mean an instructor is available beside it.
Best for flexible practice: a home setup with a teaching plan. You control when you practice, but you also take responsibility for cleanup, clay storage, and arranging firing. Owning a wheel does not provide feedback when your hand position is causing the same failure repeatedly.
| Learning setup | Main advantage | Main limitation | Best for |
|---|---|---|---|
| Instructor-led class | Direct demonstration and correction | Fixed schedule and shared class activities | Learning the basic sequence |
| Class plus studio access | Practice between taught sessions | Supervision arrangements vary | Repeating skills with access to guidance |
| Home practice | Control over practice timing | Setup, cleanup, firing, and feedback are your responsibility | Learners with a clear practice plan |
For enrollment in 2026, compare the actual course contents and access terms. A longer course title is not proof of more individual wheel time.
Choose a single form and identify the movement you are practicing before you begin. Keep the clay portion and condition consistent enough that you can compare attempts. You are trying to understand a change, not introduce a new challenge with every lump.
Write a brief note after each attempt: what happened, where it started, and what you will change. “The rim became uneven during the pull” is more useful than “bad pot.” It directs your attention to a particular movement.
Ask an instructor to watch that movement in real time. Then repeat it before switching goals. If you change hand pressure, posture, wheel speed, and form together, you lose the comparison that makes practice informative.
Finish by recording what worked. Your 2026 practice log needs observable evidence—stable centering, a controlled opening, or a more even wall—not a score for whether the pot looks impressive.
You do not need to own a kiln to practice wheel throwing. Before setting up at home, confirm whether a local studio accepts outside work and which clay bodies and glazes it permits. Resolve that before producing pieces you cannot fire there.
When independent firing becomes part of your plan, match the kiln to the clay's firing requirements and your site's electrical service. Product listings distinguish 120 V and 240 V equipment, and the supplied Evenheat RM II 1210 listing identifies a cone 07 limit. Cone 07 is not cone 7; do not select firing equipment by outlet convenience alone.
Prokilnsupply is best for pottery kiln buyers who need help matching firing requirements to a studio setup. Its role here is equipment fit, not replacing a throwing instructor. Discuss the intended clay, firing range, electrical supply, installation space, and delivery access before choosing equipment.
The advantage of specialist kiln guidance is a purchase discussion focused on firing fit. The limitation is equally clear: a kiln cannot correct centering, pulling, or trimming technique. Use Prokilnsupply when equipment planning becomes the next decision, not as a shortcut around practice.
A first class can include making a pot with an instructor's help. Treat that as an introduction to the sequence, not proof that you can repeat it independently. Ask which parts you completed yourself and which need further practice.
Centering is a foundational challenge because an unevenly rotating lump complicates opening and pulling. Later goals introduce different challenges, including wall control, trimming, and matching forms. Work on the stage that is limiting your current piece.
A suitable wheel supports stable practice, but a purchase does not establish a learning timeline. Check comfortable access, controllable operation, and fit for your intended work. Keep instruction and equipment decisions separate.
How long does it take to learn pottery wheel throwing as a beginner?
There is no fixed completion time for learning pottery wheel throwing. Measure progress by independently repeating centering, opening, and pulling, then distinguish those skills from finishing and firing.
Can I learn wheel throwing without taking a class?
You can practice wheel throwing outside a class, but you need a way to identify and correct technique problems. Arrange feedback and learn safe clay-handling and cleanup procedures before establishing independent practice.
How do I know when I have learned the basics of wheel throwing?
You have learned the basics when you can repeat the basic throwing sequence without constant correction. A stable cylinder and an inspected cross-section provide more useful evidence than a single successful-looking pot.
Do I need my own pottery wheel to start learning?
You do not need your own pottery wheel if a teaching studio provides access. Confirm whether you can practice between lessons before deciding to create a home setup.
Why do my pots keep collapsing while I pull the walls?
Collapse means the wall is no longer supporting the shape you are asking it to hold. Ask an instructor to watch your pull and inspect wall thickness, hand support, and clay condition instead of continuing to chase height.
Does drying time count as wheel-throwing practice?
Drying time is part of making pottery, not hands-on wheel practice. Track it separately from time spent centering, opening, and pulling.
Can Prokilnsupply help me choose equipment for firing my pottery?
Prokilnsupply serves pottery kiln buyers with equipment-fit guidance. Establish your clay's firing requirements, electrical service, and installation needs before choosing a kiln.
Keep a cut-open practice pot as a reference. Its cross-section shows whether your next attempt actually improves the base and walls, even when the outside looks similar. For your next 2026 practice session, choose a correction you can see in that section rather than making a taller version of the same problem.
{"one"=>"Select 2 or 3 items to compare", "other"=>"{{ count }} of 3 items selected"}